
How to Build a Wine Cellar for Long-Term Aging
Table of Contents
- Understanding Wine Cellar Basics for Long-Term Aging
- Ideal Wine Cellar Temperature and Humidity Requirements
- Wine Cellar Insulation and Vapour Barrier Installation
- Choosing and Installing a Wine Cellar Cooling System
- How to Organise a Wine Cellar for Long-Term Storage
- DIY vs. Professional Installation: Cost-Benefit Analysis
- Smart Home Integration and Energy Efficiency
- Common Mistakes to Avoid When Building a Wine Cellar
- Frequently Asked Questions
Last Updated: October 16, 2026
Understanding Wine Cellar Basics for Long-Term Aging
Understanding how to build a wine cellar for long term aging requires three pillars: temperature stability, humidity control, and proper storage configuration.
Fluctuating temperatures age wine unpredictably; dry air ruins corks and allows oxidation; vibration and light accelerate degradation. Get these basics right and your collection improves with time.
At 79North Ltd, we work with independent wine shops and restaurants that invest in proper cellaring before building inventory, they're not just buying bottles, they're committing to preservation.
This guide covers the science behind storage conditions, cooling and insulation choices, and the common mistakes that undermine well-intentioned builds.
Ideal Wine Cellar Temperature and Humidity Requirements
The ideal wine cellar temperature sits between 7°C and 18°C, with 13°C the sweet spot for most red and white wines.
Temperature fluctuations make the liquid expand and contract, pushing wine past the cork seal and letting air in.
Humidity should sit between 50% and 80%, ideally around 70%. This range protects cork from drying out while preventing mould growth on labels and packaging.
Wine Cellar Insulation and Vapour Barrier Installation
Insulation and a vapour barrier form the thermal envelope that keeps your cellar stable. This is the most consequential part of the build: a correctly sized cooling unit cannot compensate for a poor envelope, and most long-term failures trace back here.
Why the envelope matters more than the cooler
A cellar is a cold room inside a warmer, more humid building. Vapour diffuses toward the cold side; if it reaches a surface below its dew point, it condenses, soaking insulation and creating mould and timber decay.
The vapour barrier must sit on the warm side of the insulation, the face towards the heated part of the building, so moisture is stopped before it enters the insulation.
Specifying insulation: thickness and U-values
For a cellar held near 13°C inside a heated building, most practitioners specify a target U-value for walls, floor and ceiling of 0.20-0.25 W/m²K. That is a performance target, not a product, the thickness needed depends on the material's lambda value.
As a working guide for common materials:
- Polyurethane (PIR) rigid board (lambda around 0.022-0.025 W/mK): roughly 80-100mm achieves the target on a wall.
- Expanded polystyrene (EPS) (lambda around 0.030-0.038 W/mK): roughly 100-150mm.
- Mineral wool (lambda around 0.035-0.040 W/mK): roughly 120-150mm, but it must be kept dry and protected by a continuous barrier.
- Spray foam (closed-cell, lambda around 0.022-0.028 W/mK): 80-120mm, and it doubles as an air seal.
Always confirm the declared lambda and thickness on the product data sheet, and check the assembled U-value. Continuous insulation, no thermal bridges at studs, joists or wall ties, matters as much as thickness.
Choosing the right material for the space
- Rigid PIR or EPS board: best moisture resistance, easy to cut and fit, takes up less depth than soft insulation. The default choice for most conversions.
- Closed-cell spray foam: fills gaps and irregular surfaces and provides excellent air sealing, but costs more and needs a specialist installer.
- Mineral wool: fire-resistant and good where fire performance matters, but poor if it ever gets wet, so it depends entirely on a flawless barrier.
- Fiberglass batts: cheapest, adequate for above-ground spaces, but the least forgiving if moisture reaches them.
Installing the vapour barrier correctly
The barrier goes on the warm side of the insulation, before the insulation is closed in. Use polyethylene sheeting of at least 0.15mm (many specify 0.2mm or a proprietary membrane). Continuity is critical:
- Overlap seams by at least 100mm and seal every seam with vapour-barrier tape.
- Seal around pipes, cables, conduits and door frames with proprietary grommets or mastic, gaps at penetrations are where most failures start.
- Run the barrier continuously behind electrical back-boxes, or use airtight boxes.
- Tape the barrier to the floor membrane and to the ceiling membrane so the whole room forms one sealed box.
Pressure-test or smoke-test the barrier before closing the walls, far cheaper than stripping a finished cellar later.
Floors, ceilings and the basement case
In a basement, lay a damp-proof membrane (DPM) across the floor before insulation and flooring, lapped and sealed to the wall barrier. Insulate the floor too, a cold floor pulls heat from the space and creates stratification.
The ceiling needs the same treatment if there is a heated room above: insulation plus a barrier on the warm (upper) side. Do not forget the door, a hollow or uninsulated door is a thermal bridge and a vapour leak, so specify an insulated, well-sealed door with a threshold seal.
Thermal mass: working with the structure
Stone, concrete and brick absorb and release heat slowly, smoothing temperature swings. In a basement, insulate on the room side so the concrete mass stays at cellar temperature rather than being driven by the building above.
Choosing and Installing a Wine Cellar Cooling System
Your insulation and vapour barrier create the envelope; your cooling system maintains conditions inside it. It must be sized correctly, an undersized or oversized unit undermines even a perfect envelope.
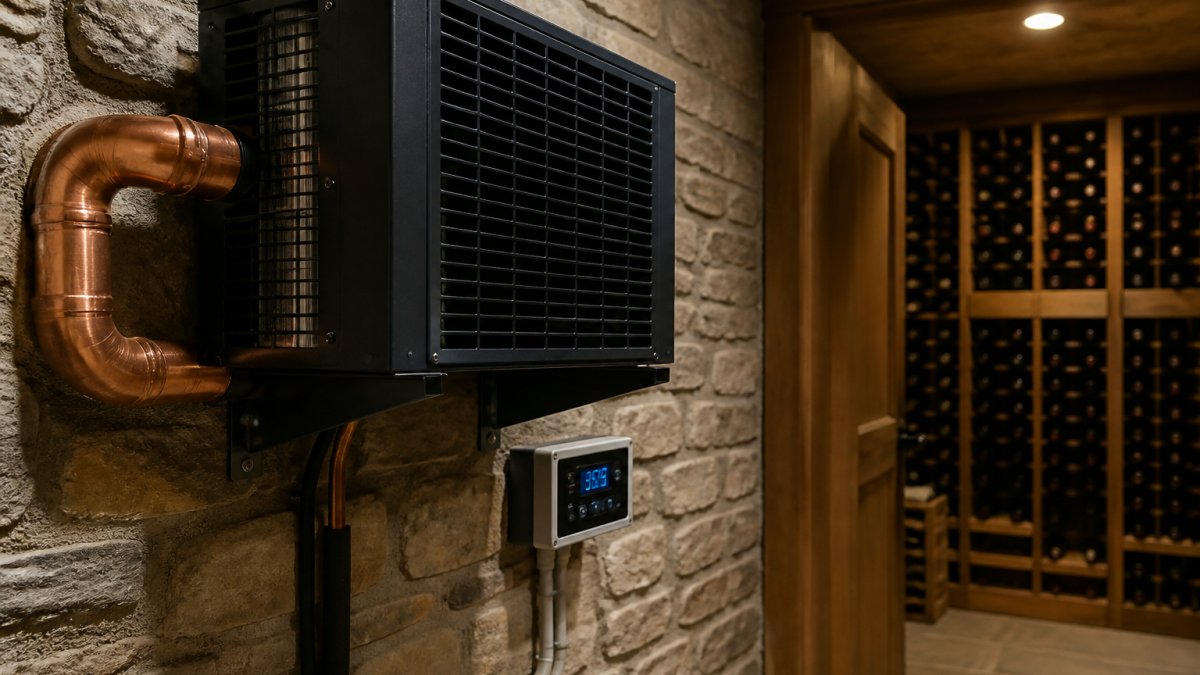
Passive vs. active cooling
Passive cooling relies on the surrounding space's natural temperature. In a basement where ground temperature stays around 13°C year-round, you can insulate well, seal air leaks, and let the earth do the work, but only where the space is genuinely stable. Most cellars need active cooling.
The main unit types
- Self-contained (through-wall) units: the whole system sits in one box vented through an external wall. Simplest to install and cheapest, but they reject heat to the outside and can be noisy; suitable for smaller cellars.
- Split systems: an indoor evaporator in the cellar and an outdoor condenser, linked by refrigerant pipework. Quieter, more efficient, and the standard for most domestic cellars. They cool and dehumidify simultaneously.
- Ducted systems: the condenser is remote and ducted, so the cellar stays visually clean and the unit can serve awkward spaces. More complex and more expensive to install.
- Water-cooled units: reject heat to a water circuit rather than air, useful where there is no external wall for a condenser.
For most conversions, a split system is the sensible default: it is efficient, quiet, and keeps the working parts out of the cellar.
Sizing the unit correctly
Size by volume and heat load, not floor area. A 100-bottle cellar (roughly 4m³) needs very different capacity from a 500-bottle cellar (roughly 15m³).
As a rough guide, a well-insulated domestic cellar typically needs 100-150W per cubic metre of cellar volume, but this varies with insulation quality, glazing and climate.
Herdade da Calada 2020 Caladessa Reserva Tinto Vinho →
Undersized units run constantly, fail to hold humidity and wear out early. Oversized units cycle on and off, causing temperature swings and poor dehumidification. Both are false economies.
Installation essentials
- Mount the evaporator so air circulates freely around it, not boxed in behind racking.
- Keep the condenser clear of obstructions and out of direct sun.
- Ensure the condensate drain runs to a suitable outlet with a fall; a blocked drain is a common cause of humidity failure.
- Seal all pipe and cable penetrations through the vapour barrier.
- Commission the unit and let it stabilise for several days before loading the cellar with wine.
Maintenance schedule
- Monthly during cooling season: clean or replace the filter.
- Quarterly: check the condensate drain and clear any blockage.
- Annually: check the refrigerant charge, clean the condenser coil, and inspect the door seals.
- Continuously: monitor temperature and humidity logs (see the smart monitoring section) so drift is caught early.
How to Organise a Wine Cellar for Long-Term Storage
Organisation affects how well wines age.
Racks should be vibration-free and stable, avoid wheels or anything that moves easily.
Group wines by drinking window: bottles for 2-3 years in one section, wines aging 10+ years in another.
Label racks by region or vintage to find bottles faster and minimise time with the cellar door open, which destabilises temperature and humidity.
DIY vs. Professional Installation: Cost-Benefit Analysis
Building a wine cellar yourself saves money but demands precision.
The difference is labour and expertise: professionals ensure continuous insulation, a correctly sealed vapour barrier, and a properly sized cooling system, and they handle structural issues.
DIY works if you're comfortable with basic carpentry, can measure accurately, and have time to research each step.
Consider hiring professionals for the insulation and vapour barrier work, then installing racks yourself.
Smart Home Integration and Energy Efficiency
Modern cooling units connect to smart home systems, letting you monitor temperature and humidity from your phone.
Some units log temperature and humidity data, revealing problems you'd otherwise miss, a cellar that swings 2°C daily might feel stable, but the logs prove otherwise.
Look for inverter compressors, which adjust cooling power to demand rather than cycling on and off; they run quieter and use 20-30% less electricity than fixed-capacity units.
Good insulation also pays back through lower electricity bills, since a well-insulated cellar needs less cooling.
Common Mistakes to Avoid When Building a Wine Cellar
The most common mistake is skipping or undersizing the vapour barrier.
The second mistake is choosing a cooling unit without considering thermal mass and insulation.
The third mistake is poor sealing around the cellar door.
Don't underestimate air circulation: stagnant air creates hot and cold spots, so a small fan (not pointed at bottles) keeps temperature even.
Finally, design with 20-30% extra capacity, a 50-bottle cellar with no expansion space becomes cramped quickly, forcing a rebuild within five years.
Learning how to build a wine cellar for long term aging balances science with practical construction. At 79North Ltd, we partner with independent wine retailers and restaurants who know proper storage protects inventory quality, especially premium Portuguese and Italian wines.
Frequently Asked Questions
What is the ideal cellar temperature for long-term wine storage?
The ideal temperature for long-term wine aging is 10-15°C, with 12°C considered optimal. Consistency matters more than the exact figure, temperature fluctuations cause expansion and contraction of wine inside the bottle, which can damage corks and accelerate oxidation. Even a swing of 5°C annually can shorten a wine's aging potential significantly. Most commercial cellars maintain this range using active refrigeration or passive cooling in underground spaces where thermal mass naturally stabilises temperature year-round.
What humidity should a wine cellar have?
Relative humidity between 50-80% is ideal for wine storage, with 70% as the target. Low humidity below 50% dries out cork seals, allowing oxygen to enter and spoil the wine. Excessive humidity above 80% promotes mould growth on labels and structural materials, though it does not affect wine inside sealed bottles. A properly sealed cellar with insulation and vapour barriers maintains this range naturally; active humidification or dehumidification systems help fine-tune levels in problematic climates.
How long can wine be stored in a home wine cellar?
Premium wines aged in proper cellars can develop for 20-50+ years, depending on vintage, grape variety, and storage conditions. Wines like Burgundy, Bordeaux, and Portuguese Reservas improve with age when kept at stable temperatures with minimal light exposure. Most everyday wines reach their peak within 3-5 years. Maintaining ideal temperature stability, humidity, and darkness is essential, even one season of poor conditions can halt aging potential. Wines with high tannins and acidity age longest.
Do you need a dedicated cooling system for a wine cellar?
A dedicated cooling system is essential unless your cellar is underground in a climate naturally cool year-round. Active refrigeration units maintain precise temperature control; passive cooling (earth-sheltered design, thick insulation, thermal mass) works only in cool regions. For restaurants and serious collectors stocking premium Portuguese and Italian wines like those from 79North Ltd, professional cooling ensures consistent aging conditions.